Abstract
Double benching has been utilized as an excavation technique in open pit mines for many years. This process involves drilling, blasting, and excavating the material for the design bench height. A second bench is then excavated without the creation of a catch bench, i.e. only minimal offset from the first bench face is allowed when drilling off the second bench. The result is a double high bench face or double bench.
When drilling off the second bench, the offset of the drill from the bench face projects the lower bench face into the pit up to an extra five meters. This reduces the maximum attainable bench angle, enhances the probability of rock escaping the catch bench and increases the overall strip ratio. The generally utilized process of trim blasting also can impact on the final bench profile by contributing to blast damage of the face. BHP Billiton Diamonds Inc., Ekati Mine Diamond MineTM, has pioneered the usage of a technique that eliminates this offset. Double benching is accomplished by drilling a single, 30m pre-shear (two 15m benches) to define and protect the final bench profile. This article provides a comparison of the attained face angles obtained in the field utilizing both of the above methods, as well as a comparison with the analytically predicted angles prior to excavation.
1. Introduction
The BHP Billiton Diamonds Inc., Ekati Diamond MineTM is the largest producer of gem grade diamonds in North America. It is currently an open pit operation located approximately 300km northeast of Yellowknife in the Northwest Territories in Canada (Figure 1). This article references the Panda pit, which was the first open pit diamond producer in Canada.
The Panda pit is centered on a diamondiferous kimberlite pipe. The pit walls are located in the country rock which consists of granite/granodiorite exhibiting varying grades of metamorphism. The country rock is quite strong and displays well-developed, relatively widely spaced, discontinuity (joint) sets. These joint sets have been characterized as to their spatial characteristics both through oriented core drilling and area mapping in the open pit. Strength parameters of the intact rock and discontinuity sets have been determined through laboratory testing.
At present, the open pit is near circular (Figure 2), with a diameter of about 650m. It has an attained a depth of 220m with a planned depth of 300m. During the pre-stripping phase and early production, drilling and blasting utilized Driltech DK90 single pass rigs with 31cm diameter holes loaded with 30/70 emulsion. Later some of the results of the blasting improvement studies saw these rigs modified to drill smaller 27cm diameter holes, resulting in better fragmentation due to improved emulsion/column distribution. Excavation of the blasted ore and waste was conducted utilizing a Komatsu Demag 655SP diesel hydraulic shovel together with Caterpillar 793 trucks. Later mining was conducted with a CAT 5130 excavator, CAT 994 and 992 loaders matched with CAT 777 haul trucks. Approximately 80,000 - 100,000 tonnes of material were hauled per day from the Panda pit.
This pit is located in an arctic climate. As such, even though the kimberlite pipe was originally located under a lake, approximately half of the depth of the pit walls was excavated in rock at permafrost temperatures. This reduces the effects of groundwater on the pit walls, with the exception of the few months when thaw occurs, and a 5-10 meter active zone on surface melts and releases any groundwater that was retained as ice.

Figure 1 - Location of the Ekati Diamond Mine

Figure 2 - Aerial view of the Panda pit
The economics of the pit are driven by the slope angles attainable in the country rock. The steeper the overall slope, the greater the depth to which the kimberlite pipe can be extracted using open pit methods. As the pit slopes are primarily controlled by catch bench requirements, the attainable bench face angles play a critical roll in the overall slope angle. In addition, this was the first operation utilizing double benching in the Northwest Territories. As such, considerable importance was placed on maximizing the bench face angles and ascertaining that the required catch bench widths were being maintained.
2. Geologic/Geotechnical Background
The Panda pit is located in the Slave Structural Province, an Archean craton that totals approximately 210,000 km2. It consists of, in approximate chronological order of deposition/emplacement:
• basement rocks composed of intrusives and metasedimentary gneisses;
• mafic to intermediate volcanic rocks;
• diabase dikes, and;
• inland sea sediments (shale, siltstone, mudstone, possibly sandstone)
The Slave craton is bordered by two prominent faults, the Bathurst and McDonnell. The Bathurst fault is sinistral and trends 340° while the McDonnell fault is dextral and trends 060°. The resulting fabric induced in the host rock by the associated stress regimes can be seen in the accompanying stereonets (Figure 3). Within the alkaline granite-diorite assemblage (hereafter referred to as granite) in which the pipes have been emplaced, some gneissic texture is present, with segregation and alignment of biotite micas (or chlorite). The presence and magnitude of the foliation varies throughout the rock mass.
Pegmatite dikes are occasionally encountered in the granite, as are diabase dikes. While not having the same composition as the surrounding rocks, they are limited in size and sufficiently similar in characteristics as to behave similarly to the granite.

Figure 3 - Typical stereonet, Panda granite

Figure 4 - Discontinuity shear strength, granite
2.1. Rock fabric
Rock fabric orientation data utilized in the Panda pit design was collected from oriented drillholes as well as area (cell) mapping on rock faces exposed during the pit pre-strip. Both of the above techniques provided information regarding joint orientations and surface conditions (large and small scale roughness as well as infill). Only cell mapping of the exposed pit walls provided information regarding the continuity (length) and joint density (spacing) of the fabric sets.
As stated previously, rock fabric within the country rock tends to sub-parallel faulting in the area. The Panda pit granite exhibits discontinuities that are very continuous and planar, with relatively wide spacing between individual structures. Discontinuity infill consists primarily of chlorite, clay, epidote, calcite, quartz, and hematite.
Discontinuity sets were chosen by manually examining and determining sets for the total structure orientation database within a potential geologic domain. A typical stereonet for the Panda pit rock fabric is shown as Figure 3. There are essentially three primary groupings of discontinuity sets: sub-vertical, intermediate dipping, and subhorizontal.
The sub-vertical sets appear to be related to the Bathurst and McDonnell regional fault systems. These sets strike northeast and northwest. At times, and dependent upon location, these generalized groupings may be broken down into two joint sets, as shown for the northeast striking sets of Figure 3, with an offset of about 30 degrees. This is apparently a function of a shift in prehistoric stress fields. Two intermediate dipping sets, striking to the northeast and the northwest are also present. These appear to be somehow related to accommodation of the sub-vertical features, becoming more frequent, with greater length, as major faults are neared. A variety of sub-horizontal joints and faults are also found in the Panda area. Their genesis is unknown, but at times they exhibit a shear component, indicating that they are not strictly related to glacial unloading. These sub-horizontal features have not yet had a substantial impact upon slope stability but are one of the leading conduits of blast gases into the pit wall.
2.2. Material properties
The material properties of the rocks composing the pit walls are required for geotechnical analysis of bench stability. The properties that were determined for rocks composing the benches were:
• density (mean: 2.71, deviation: 0.06)
• intact rock compressive strength (mean: 150 MPa, deviation: 40 MPa)
• discontinuity shear strength (peak and residual, power curve, see Figure 4)
As can be seen, this material may be classed as strong rock. Bench scale failures will be restricted to blocks defined by discontinuities, whether pre-existing or induced by excavation. Rigid block displacement along geologic structures with very minor corner crushing is the primary failure mode.
3. Bench Analytical Design
A bench design for a cut slope in rock incorporates two components (Figure 5):
• catch bench width and catch characteristics
• bench face height and face angle
These two components interact in terms of design. For example, the bench face height, face angle, and face irregularities determine, to a large extent, the horizontal velocity component of rock falling from the face above.
3.1. Bench face design
Stability analyses for bench scale slopes were conducted utilizing computer models written by J. Mathis (Ursa
Engineering) for simple wedge and plane shear failure. These models incorporate the statistical rock fabric data and rock discontinuity shear strengths presented previously. Simply put, the models generate a number of geologic structures within a rectangular solid representing the bench. The structures are represented as circular discs following the orientation, length, and density distributions attained from fabric mapping. Strengths are assigned to each of these structures and the designated failure geometry tested for a probability of failure. A Monte-Carlo simulation is run to determine actual failures for wedge and plane shear geometries and the generated failures overlapped. The backbreak distribution for the bench may then be calculated, and the expected bench face angle distribution assessed from this (Figure 6).

Figure 5 - Sectional schematic of bench

Figure 6 - Bench face angle reliability curve
3.2. Catch bench design
As rock falls from a bench face, it converts potential to kinetic energy. In addition if the rock strikes the bench face on the way down, angular momentum is imparted to the falling rock. Thus, when the rock strikes the catch bench it will have a tendency to roll away from the wall.
A catch bench is simply a cut bench on the rock slope. Its sole purpose is to "catch" the aforementioned rolling rocks so that they do not continue unhindered to the toe of the slope. The bench is designed with a specific width relative to its height so that rocks will come to rest before falling off the next crest. In addition, a "backbreak" distance is incorporated into design (Figure 5) since the bench crest will generally fail from its (usual) vertically blasted orientation. The design catch bench width is thus always wider than the bench width required for safety (Figure 5).
For the Panda pit, the required catch bench width was 11m for a 30m high double bench. The actual catch bench width as laid out for the trim, or pre-shear, shot was always greater than this required width, based on the bench face angle that was considered to be attainable in the field (Figure 5).
4. Standard Double Bench
The standard double bench is essentially the excavation of two standard bench heights without the creation of a catch bench at the toe of the first bench (Figure 7). This can result in a steeper overall bench face angle and a steeper interramp angle as a function of the interaction between catch bench width and bench face height.
A standard double bench layout at Panda, in the early stages of pit life, is shown in section as Figure 7. In this
diagram it can be seen that the single bench height was 15m, with a drill offset on the intermediate bench of between 5-6m from the toe of the upper bench. It s possible to drill the intermediate bench trim row closer to the toe of the upper bench. In fact, later drill rig modifications reduced the offset to 2.0 – 3.0m from the upper bench toe.
However, in practice, due to safety concerns and irregularities in the toe, it is unlikely that an offset of less than 3m could be attained on a regular basis. The blasthole depths were greater than the 15m bench height as sub-grade drilling of 1.5m was added both for the catch and intermediate benches. A heavy bottom charge was utilized to eliminate hard toes. The final bench face was blasted with a standard trim blast, delayed to detonate after the main blast initiated cast away from the bench.
The resulting bench profile is seen as Figure 8. For our purposes, we can state that for the design sectors analyzed for this article, the mean design bench face angle was around 80°. Trim blasting with a standard double bench was producing a design bench face angle (80% catch bench reliability) of 67°. As this was 13° below the design value and catch bench widths required for safety were not being maintained (Figures 7 and 8), action was required.

Figure 7 - Trim shot double bench, as planned

Figure 8 - Trim shot double bench, attained
5. Perceived Problems with the Standard Double Bench
Perceived problems with the standard double bench included the following:
• gas was being injected from the main pattern blast into the wall. This resulted in damage to the rock composing the bench face (joint extension/dilation, block motion, reduction in shear strengths, fracture initiation) resulting in reduced bench face angle. Although less gaseous explosives could be utilized, gas production is still substantial and not remediated with trim blast techniques.
• drill offset on the intermediate bench automatically added a minimum of 3m to the effective design. This resulted in a reduced bench face angle, creation of a second source of loose, raveling material and development of a bounce ledge for any material falling from the crest above. This bounce ledge could easily render the catch bench ineffective. The solution to this problem could not be addressed with standard double benching and trim blast techniques.
• sub-grade drilling for the intermediate bench blast was being conducted in the bench crest of the underlying bench. This badly damaged the rock that would compose the bench crest below. In addition, sub-grade drilling for the upper bench blast damaged the wall rock, inducing structural failures of greater size than would have occurred without this damage. Again the overall result was a reduced bench face angle. Elimination of sub-grade drilling over the underlying bench crest eliminated this.
• vibration may or may not have enhanced the aforementioned stability issues. Monitoring of the production and trim blasts did, however, give reasonable peak particle velocities.
6. Development of Double Bench Pre-shear Blast
The development and implementation of the single shot, double bench pre-shear was not completed overnight. Instead, the process was long and involved.
6.1. Theory
It was deemed unlikely that the problems associated with trim blasting utilizing standard double benching could be addressed sufficiently to meet bench design criteria. Thus, thinking outside the box resulted in the following:
• a properly designed and initiated pre-shear, would protect the bench face against gas intrusion from the main blast. Blast gases would vent along the pre-shear line and up the pre-shear blastholes. In addition, if a high detonation velocity, low gas product was utilized for the pre-shear, gas damage would be minimized from the pre-shear as well.
• the pre-shear would also assist in reducing blast vibration damage to the bench face, as it would function as a reflector. While this may or may not be important, it was a consideration.
• a normal pre-shear could have been utilized with standard double benching techniques, i.e. with the drill offset for the intermediate bench. However, the bench face angles would still be flattened by 5°-10° from design values as the drill offset would reduce the bench face angle. The pre-shear could be theoretically drilled and blasted in one pass for the full 30m double bench height, something which would be very difficult to do with trim blasting.
The resulting concept was a single shot pre-shear that would protect the bench face and crest from gas intrusion and reduce vibration damage. The elimination of the drill offset alone on the intermediate bench would immediately result in a steeper attained bench face angle.
6.2. Equipment
Small diameter pre-shear holes were initially tested using a contractor’s Ingersoll-Rand DM-45 blasthole rig equipped to drill 165mm holes in excess of 31.5 meters. Polar Explosives Ltd., Ekati’s explosives supplier assisted in selecting a pre-shear product that had a high velocity of detonation, low gas development, and would allow a fully decoupled charge within the pre-shear line. The product chosen was DYNOSPLIT C, a 44mm diameter, water-gel based explosive with the detonation cord incorporated into the string of explosive chubs.
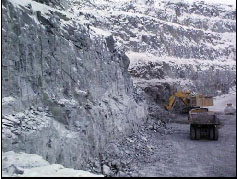
Figure 9 - Double benching showing "lip"

Figure 10 - 30m single shot pre-shear
6.3. Blast development
The research and development that lead to the present blast design occurred over a year and a half period. This evolution was well documented by Street (2000) and Peterson and Tannant (2001). A brief summary of the blast development program follows:
• initial testing by trim blasting using reduced loads of 460 kg/hole gave poor results. The majority of the wall showed no blasthole half-casts and the final bench face was controlled by major joint sets, leaving a brick-like appearance occasioned by the openness of the sub-horizontal fabric.
• testing of large diameter (311mm) 15m long pre-shear holes spaced 5m apart loaded with 100Kg of 30/70 emulsion also gave marginal results.
• over a period of 6 months, emulsion toe loads were varied between 60Kg to 120 Kg and drillhole spacing was varied between 3-5m with no substantial improvement of bench face conditions.
• the decision was then made to test small diameter pre-shearing using the equipment and explosive mentioned in Section 6.2 (above). A 15m high pre-shear pattern was designed with 2m spacing and loaded with DYNOSPLIT C. This blast was the final wall to the main ramp and was shot a few days before the main ramp shot was taken. Minor cratering was noted in the collar area of the pre-shear holes. This cratering later lead to modifications to the loading depth of the DYNOSPLIT-C in the pre-shear blasthole.
After encouraging results were obtained from the first 15m pre-shear blast, the next pattern tested was the lower 15m bench on the ramp. Again the results were promising but the drill offset or ‘lip’ remained (Figure 9). Using the DeMag shovel, this “lip” was scaled back. However, a 2-3 m lip of fractured granite remained that provided a source of raveling and a bounce platform. This led the company to initiate a trial 30m pre-shear on the next bench.
6.4. Present Pre-shear Pattern and Loads
The current pre-shear design for the Panda pit is a 165mm diameter drilled a total depth of 31.5m (1.5m sub-grade). Two strings of 44mm DYNOSPLIT-C are hung by poly rope in each hole. The lower string has two 3” BLASTEX chubs tied to the bottom to reduce the formation of any hard toes at the base of the bench. The two pre-shear blasthole spacings presently in use in the Panda pit are 1.7 m and 2.0 m. The tighter pre-shear spacing is utilized in areas of the pit that either have an increased density of unfavorably oriented joint sets and fault zones or in areas where the pre-shear line and the dominant sub-vertical joint set make an angle less than 30 degrees to the pre-shear line. Observation has shown that if the pre-shear spacing was not reduced in the latter case, the resulting final wall had a sawtooth appearance dictated by sub-vertical joint set control. This lead to increased raveling potential and additional safety concerns when personnel and equipment were working close to the highwall.

Figure 11 - 30m pre-shear, as planned

Figure 12 - 30m pre-shear, attained
The pre-shear is blasted prior to the trim shot. The “trim shot” is defined here as a 50-70 meter wide section of rock left in place to protect the final wall from production blasts. Normally a 35ms delay is placed between every 7-8 preshear holes to reduce vibration from the pre-shear blast. One benefit of the 30m pre-shear is that once the 30m bench pre-shear is drilled and blasted the lower bench is prepared for production and trim blasting. Another benefit of the 30m pre-shear is the reduced risk to the drill and blast crew. Personnel need not operate directly beneath the bench face, as they would be when drilling the second 15m bench with standard trim shot double benching.
7. Pre-sheared vs. Standard Double Bench
The present state of the bench faces leaves little doubt in the observer's mind that converting to the 30m single shot pre-shear was appropriate. As can be seen photographically in Figure 10, schematically in section in Figures 11and 12, and as bench face angle reliability curves in Figures 13 and 14, the evidence is overwhelming.
The verifiable increase in attained bench face angles is, on average, 14 degrees for the design sectors analyzed for this report. While some of this can be attributed to changes in sub-grade drilling and improved main blast sequencing, these are relatively minor constituents.
This improvement in face angles, and face conditions, leads to less raveling and, as a consequence, less bench
loading. Benches remain relatively clean with only minor crest scaling required at spring thaw. In addition, the reduction in face damage and gas injection into the rock composing the walls may increase overall slope stability as well. Blasts have been observed where gases penetrated into the rock mass more than 100m from the blast itself. If an established pre-shear can vent these gases, then the rock composing the wall should have higher retained shear strengths, resulting in greater stability.

Figure 13 – Case 1 - 30m bench face reliabilities

Figure 14 - Case 2 - 30m bench face reliabilities
8. Reverse Bench Slope
For the Panda pit, the bench was designed to slope from the crest back towards the toe at a ratio of 1V:10H. This is not as effective as a catch fence, nor as effective as a berm at the bench crest, as falling rocks with a high horizontal velocity component land near the bench crest. As only a small amount of vertical rise must be accomplished at this locale to cascade to the next bench, more escaping rock may be found using this design than with a catch fence or rock berm. However the latter two cases require maintenance and hinder cleanup and scaling, making the reverse inclined bench a practical alternative.
This reverse inclined bench (dipping back from face towards toe) is a relatively novel design. It would probably not be a good choice in areas experiencing high rainfall as it may channel water into the bench. However, it appears to function well in the arctic in sound rock. In addition, as blasting generally heavily damages the sub-grade on most benches, it is uncertain if a horizontal bench promotes improved drainage in any case. For the Panda pit, the design appeared satisfactory upon analysis and has functioned well in the field.
The results for a design catch bench width of 11m (80% reliability) specified with a reverse slope on the bench of 1m vertical /10m horizontal are shown in Figure 15. Note that few rocks escape the bench. This simulation was conducted using “RocFall”, a computer based falling rock simulation program provided by RocScience (Toronto, Ontario). Although this computer program is theoretical in nature and is sensitive to the elastic and shape parameters of the falling rocks, it is considered sufficient to provide a reasonable estimate of bench catch performance.
9. Bench Cleanup and Face Scaling
Prior to the 30m, small diameter pre-shear program, the catchments required bi-yearly clean up, especially after spring thaw. Bench clean up utilized Caterpillar D10 dozers and required that work started at the top bench and proceed downwards, cleaning each catchment. After implementation of the pre-shear program, the catchments have not required clean up and are virtually maintenance free.
A bench scaling program has evolved with knowledge gained over the first three years of operations and the changes that have occurred with final wall blasting improvements. During the initial years of pre-shearing and trim blasting, the DeMag shovel would spend appreciable time each shift rough scaling the final wall. Since the wall was not protected from blast gases and vibration from both the production and trim shots, the wall had a stacked brick-like appearance. In addition, potential wedge and plane shear failures developed along the continuous joint structures.
During Demag scaling, many of these structurally defined blocks would be further loosened and/or removed by the impressive forces imparted by the shovel. This lead to further backbreak of the bench crest and left the final wall with a rough, jagged appearance. Many structurally defined blocks were removed as they had lost their initial cohesion as a function of blast, and scaling, displacement. Other areas of the final wall had joint orientations that were very susceptible to over-scaling by the shovel. The combination of these factors created areas where up to 14m of backbreak was noted on the crest of some catchments.

Figure 15 - Reverse catch bench function

Figure 16 - 30m pre-sheared, scaled, bench face
Since the institution of the 30m small diameter pre-shear, scaling is much reduced (Figure 16). Bucket breakage of the Demag, related to scaling, has been essentially eliminated. Bucket wear has also been reduced dramatically, as has the time devoted to wall scaling and clean up. The primary scaling activity at present, besides obvious loose removal with the excavator, is chain scaling of the bench crests using a Caterpillar D10 prior to drilling off the intermediate bench
10. Summary and Conclusions
In conclusion, the development of the 30m, single shot, pre-shear appears to be a worthwhile geotechnical and operational innovation. It reduces damage to the ultimate walls of a rock excavation, allowing the full geotechnical potential of the rock mass to be exploited. This results in steeper face angles, and ultimately, steeper pit walls. The end result is a more economical pit with minimized stripping.
From an operational point of view, while being more expensive than standard trim blasting, it promotes safety. The benches, and bench faces, are extremely clean. Raveling is generally associated with spring thaw and has been relatively minor. Personnel are not operating under a broken face to drill the trim line on the intermediate bench as it has already been drilled, and blasted, from above as a pre-shear. Bucket wear on the excavator has been reduced as function of the reduced scaling required. So, too, has the amount of time spent in scaling and bench clean-up.
The development process continues at present. A “hard toe” or a ridge of unbroken rock between the pre-shear line and the main blast still occurs occasionally on both the intermediate bench and catch bench levels. This requires secondary blasting for removal. In order to address this problem, the following is being conducted:
• the “trim shot” final row is being moved from 3m away from the pre-shear line to 2.5m
• place additional emphasis on secondary blasting of hard toes on the intermediate bench so that this does not hinder the intermediate bench drilling from being on the design line
• use heavier loads in the final row of the “trim shot” for the intermediate bench. A light load will still be used in the upper bench “trim shot” final row to reduce crest damage.
This above described method is not proposed as a panacea for all rock slopes and all rock masses. It will function only in certain rock masses with specific failure modes. However, the method should be evaluated if double benching is proposed for an excavation, especially in strong, relatively massive, rock masses.